 Chopsticks Guide
Origami Chopstick Rest: Fold a Paper Wrapper in 7 Steps
Use one clean paper sleeve, a precise center crease, and two balanced legs to make a temporary tabletop rest.
Quick Answer: Flatten a clean rectangular chopstick wrapper, mark its midpoint, fold both ends to the center, fold the packet in half, add a lengthwise mountain crease, reverse-fold the two ends into legs, and press the top into a low plateau. Set the eating tips together on the plateau and widen the legs if the rest rocks.
The wrapper fold at a glance
- Paper
- One clean, dry, intact rectangular chopstick wrapper
- Method
- Center, quarter, mountain, leg, and plateau folds
- Contact
- Both eating tips sit together across the flat top
- Balance
- Four paper feet should touch the table without rocking
- Purpose
- A temporary rest that keeps the tips off the tabletop
- Limit
- Discard paper that becomes wet, greasy, crushed, or unstable
Choose a wrapper that can hold a crease
Start with the paper sleeve from your own unopened pair of disposable chopsticks. Open only one short end, slide the chopsticks out, and flatten the wrapper without tearing down its length. A long rectangular sleeve is easier to divide into equal sections than a short decorative band.
The paper should be dry, clean, and firm enough to keep a sharp fold. Skip a sleeve that is waxy, plastic-coated, greasy, damp, or already split. This model depends on friction between several layers; slick or softened material may spring open even when the sequence is correct.
Work on a dry, flat table with the wrapper horizontal. Keep the chopsticks and bowl away from the folding area until the rest is finished. The paper is not a preparation surface for food: it only supports the clean eating tips after the model passes a quick balance test.
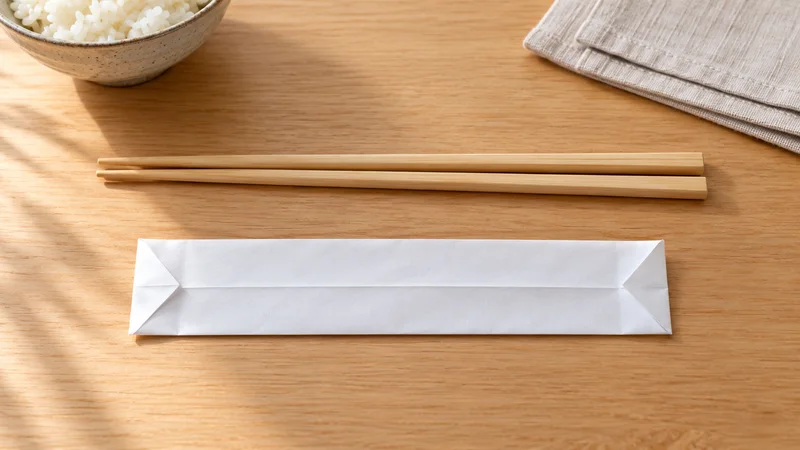
Fold the wrapper into a compact base
- Mark the midpoint. Bring the two short ends together, pinch a light crease at the center, then open the wrapper flat again.
- Bring both ends inward. Fold the left short end to the center mark. Repeat with the right end so the two folded edges meet without overlapping.
- Quarter the strip. Fold the left half over the right half. The packet is now one quarter of the wrapper's original length, with several aligned paper layers.
- Create the ridge. Fold the packet lengthwise through all layers, then open it slightly into an inverted V. Press the long crease firmly because this ridge carries the load.
This page follows the plateau-style sequence published by Origami Resource Center. Keep all edges aligned before sharpening a crease; correcting a crooked quarter fold later is harder because every leg will inherit the error.
Do not mix in steps from a ring-style stand midway through the model. The City of San Diego's How-To Festival handout documents a useful ring-and-tuck wrapper stand, but it uses a different structure. Either method can work; combining them produces neither one reliably.
Form the legs and flatten the top
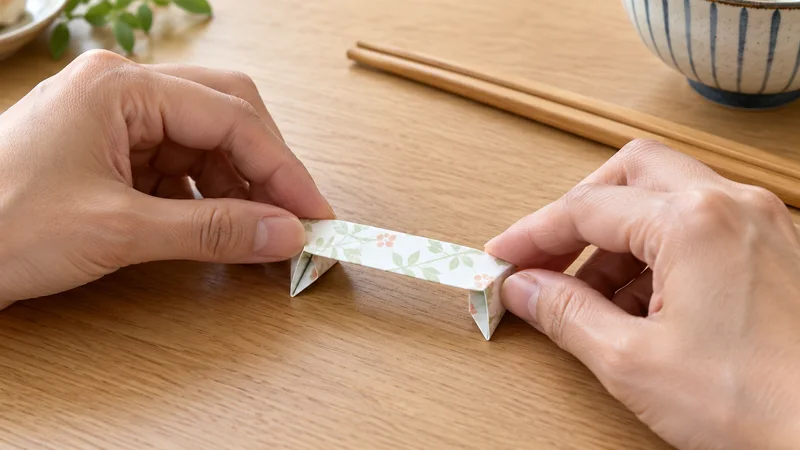
- Reverse-fold the left end. Open the layers at the left short end. Valley-crease the pointed tip diagonally downward toward the table, unfold that crease, then push the point inward between the paper layers so the crease reverses and the tip emerges below the packet as a short leg. Close the layers when the tucked point reaches the bottom edge; do not pull the center ridge flat.
- Mirror the fold on the right end. Make the diagonal crease in the opposite direction, open the right end, push its pointed tip inward to the same depth, and close the layers. Viewed from table level, both tucked tips should face down symmetrically and touch the table at the same height; reopen only the deeper fold if one leg is shorter.
- Make the plateau. Press down gently on the top of the mountain. Flatten only the center into a narrow horizontal shelf while keeping both side walls and legs standing.
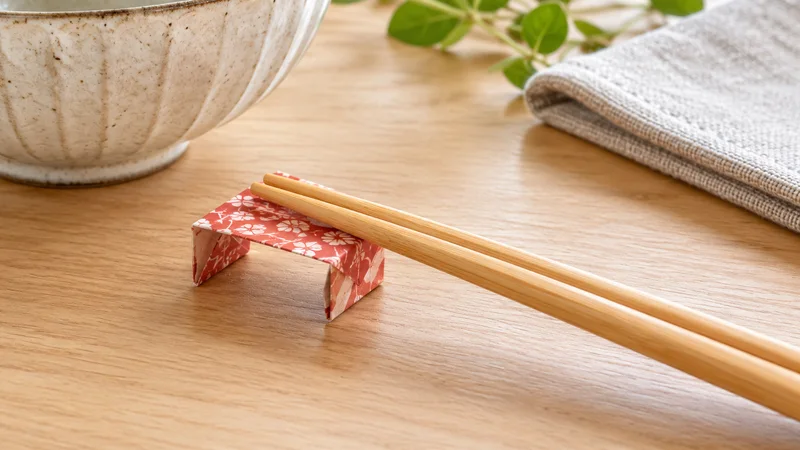
The finished model should resemble a low paper bridge, not a flat packet. If you press the entire ridge down, the side walls disappear and the rest loses height. If the plateau is pinched too narrowly, round chopsticks may roll off.
Shape the paper with small adjustments rather than pulling hard on one leg. A light squeeze at each corner can square the plateau while preserving the reverse folds underneath.
Test the finished rest before the meal
Place the empty rest on the table and tap the plateau lightly with one finger. All four paper feet should remain in contact with the surface. If it rocks, open the shorter leg slightly or sharpen its reverse crease until both sides match.
Lay the two chopsticks together across the plateau with the eating tips supported and the handle ends extending toward your place setting. The tips should stay off the tabletop without spreading apart. Move the rest farther from the table edge if the handles overhang or make the model twist.
A paper rest is small, so it should not carry utensils, bowls, or wet serving tools. If sauce reaches the wrapper, replace it rather than refolding softened paper. For a reusable table setting, the site's chopstick rest guide compares washable shapes and materials.
Fix a rest that leans, opens, or collapses
The rest leans to one side. Compare the reverse folds at both ends. One leg is usually deeper or steeper. Open only that end, match its diagonal crease to the other side, and close the layers again.
The packet opens. Sharpen the quarter fold and the lengthwise ridge with a fingernail or the flat side of a clean spoon. Very glossy paper may not hold enough friction; use a plain paper sleeve instead of adding tape near the eating tips.
The top collapses. Restore the inverted V first, then press only the middle third into a plateau. The sloped side walls are structural. A wide flat press from end to end removes the bridge shape.
The chopsticks roll away. Widen the plateau slightly and set both sticks parallel. If the rest is much narrower than the two tips together, fold a new wrapper with a broader top rather than balancing the chopsticks on an edge.
When to use a reusable rest instead
Use a supplied ceramic, wood, or metal rest when one is already on the table. Folding a wrapper is optional, not a universal rule of Japanese, Chinese, Korean, or Vietnamese dining. Restaurant customs vary, and a host's place setting takes priority over an improvised craft.
Do not fold wrappers from shared place settings or wrappers handled by another diner. Keep torn ends and scraps contained. At the end of the meal, place the used paper with the appropriate waste rather than leaving a loose model on the table.
If there is no rest and no usable wrapper, the answer is not to improvise with a napkin, sauce dish, or shared plate. Follow the setting or ask the host. The guide to where to put chopsticks after eating covers several table contexts, while the main etiquette guide explains common placement mistakes.
Seven-step folding reference
| Step | Action | Check before continuing |
|---|---|---|
| 1 | Mark the wrapper midpoint | The center pinch is square to the long edges |
| 2 | Fold both short ends to center | The two edges meet without overlap |
| 3 | Fold one half over the other | The packet is one quarter of the original length |
| 4 | Mountain-fold lengthwise | The ridge is sharp and centered |
| 5 | Reverse-fold the first end | The paper leg points down and sits flat |
| 6 | Match the second leg | Both ends have equal height and angle |
| 7 | Press a narrow top plateau | The bridge stays raised and does not rock |
Questions about paper chopstick rests
Can I use any chopstick wrapper for this fold?
Use one clean, dry, intact rectangular paper wrapper that holds a crease. Skip plastic sleeves, waxy paper, torn wrappers, and any wrapper that is wet or greasy.
Is it acceptable to fold a wrapper in a restaurant?
It can be a quiet table craft using your own unused wrapper, but it is not a universal etiquette requirement. Keep scraps contained, do not handle shared wrappers, and use a supplied rest when one is available.
Why does my paper chopstick rest collapse?
The usual causes are soft creases, uneven legs, or a plateau that is too narrow. Sharpen the lengthwise mountain fold, match the two leg folds, and press a wider flat top.
Which part of the chopsticks goes on the rest?
Place the two eating tips together across the top plateau. The rest should support the tips without letting them touch the table or slide into a sauce dish.
Can I reuse a paper chopstick rest?
Treat it as a temporary single-meal rest. Discard it if it becomes wet, greasy, crushed, or unstable; use a washable ceramic, wood, or metal rest for repeated use.
Sources and related guides
The seven-step model follows the Origami Resource Center wrapper stand instructions. The City of San Diego How-To Festival handout shows a separate ring-and-tuck method, illustrating why instructions from two models should not be mixed.
For adjacent projects, see the DIY chopstick case guide, the rest and holder guide, and the chopstick etiquette overview.